Adding daily timesheets in the WorkGuru mobile app on your iOS device is easy. You can add timesheets from the Quick Actions menu by tapping the Plus icon in the footer of the app. Note: The mobile app will recognise If you have blocked timesheet entry by project or task status in your project settings.
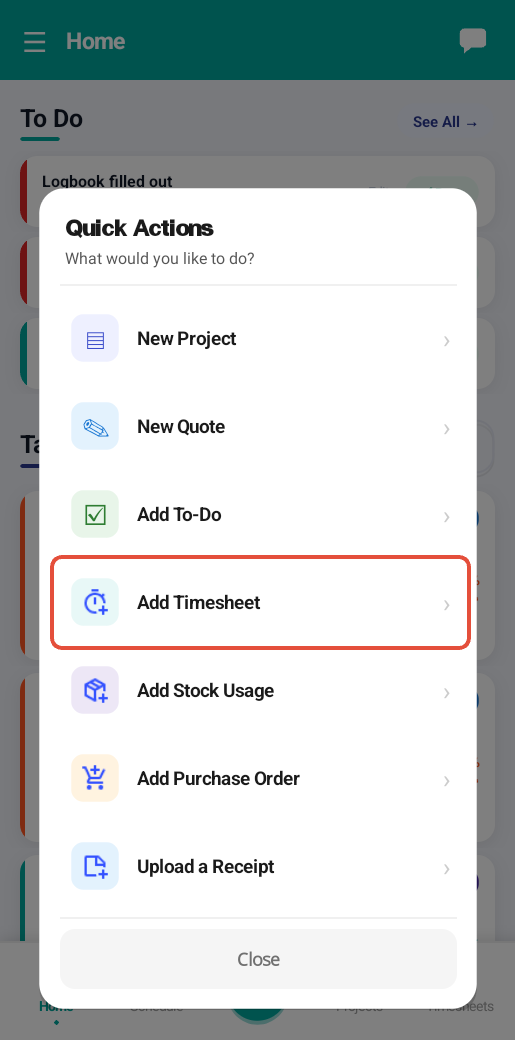
Tap Add Timesheet to start the timesheet entry. There are two ways to enter time via the mobile app:
Timer
The easiest way to enter time is to start and stop your timesheet in real time as you are completing project or production tasks. Simply search for and select the Project, then select the appropriate Task and tap Start Timesheet. Note: The project will be pre-selected for you if you are adding a timesheet from the mobile project's dashboard.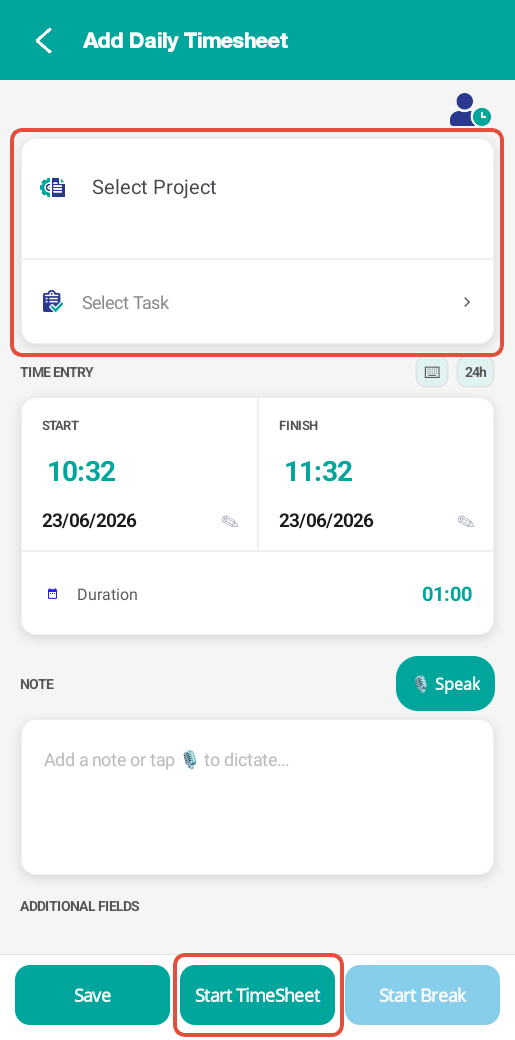
When the timer is active, a banner will display on the Home page displaying timer details. The apps Quick Actions menu will also display Stop Timesheet. Note: You cannot run multiple timers at once.

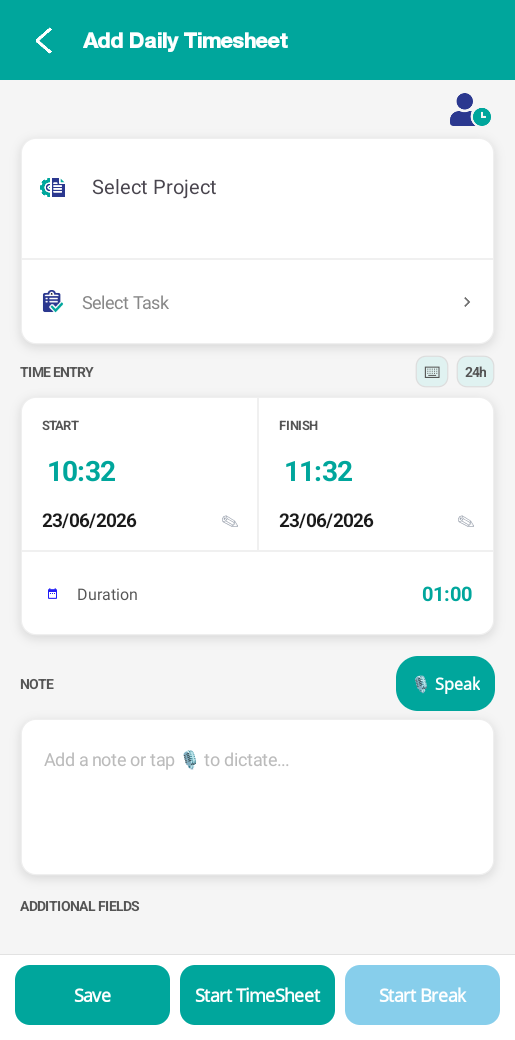
You can quickly save a timesheet directly from the timer banner by tapping the Stop icon (red square). This will automatically save the timesheet in the background. If you need to add a timesheet note, make sure you tap Add Note BEFORE you stop the timesheet. If you want to change the timesheet details before saving, tap Stop Timesheet from the Quick Actions menu. The timesheet details will be displayed and can be modified if required. Tap on the Start and Finish times and dates to modify the timesheet duration. Tap the note field to type text or tap Speak to enter a timesheet note, you will need to approve the app request to access the device's microphone for this function to work.. Any timesheet custom fields will be displayed under Additional Fields to be completed also. Tap Save to apply the changes and save the timesheet.
Duration
You can enter your timesheet retrospectively by entering the start and finish times of the duration of the timesheet.
- Project - Search for an select the project to add the timesheet to.
- Task - Select the project's task, it will also include the phase that the task is assigned to if relevant in the following format - Task name - Phase name.
- Start - Timesheet start date, hour and minute.
- Finish - Timesheet finish date, hour and minute
- Duration - Confirm the calculated timesheet totals. Display format is days:hours:minutes (DD:HH:MM). You can also directly enter a timesheet duration in this filed. If done, the finish time defaults to the current start time + the duration.
- Note - Tap the note field to type text, or tap Speak to dictate notes quickly via voice to text. You will need to approve the app request to access the device's microphone for this function to work.
Tap Save to submit timesheet.
Was this article helpful?
That’s Great!
Thank you for your feedback
Sorry! We couldn't be helpful
Thank you for your feedback
Feedback sent
We appreciate your effort and will try to fix the article