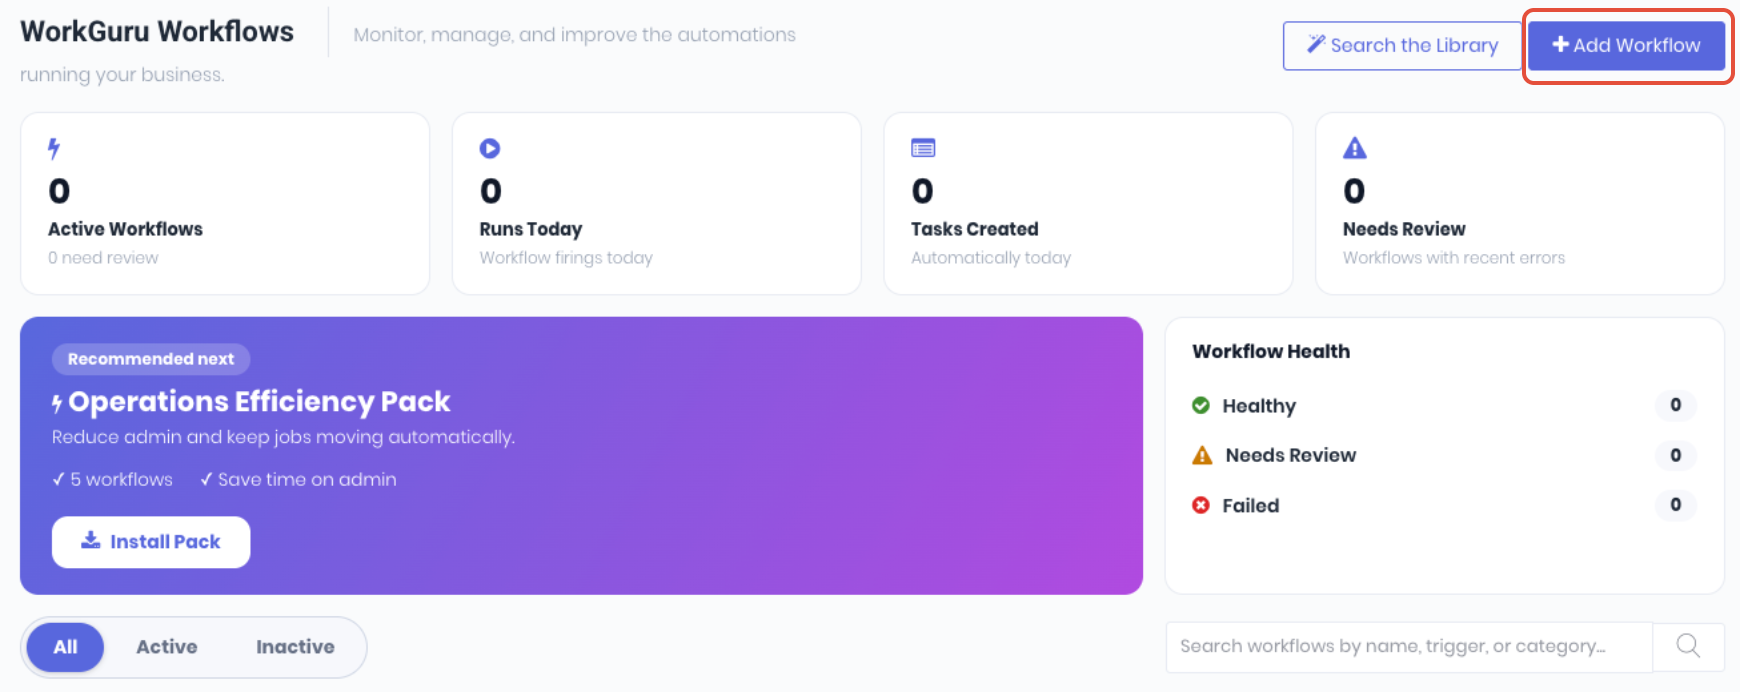
New custom (created from scratch by you) workflows can be added by the workflow dashboard by clicking Add Workflow. Adding a Workflow consists of a conditional logic query based on the three steps:
To add a manual workflow, click Add Workflows.
Trigger Event
On the Add or Edit Workflows page enter the workflow details and select the required Trigger Event.
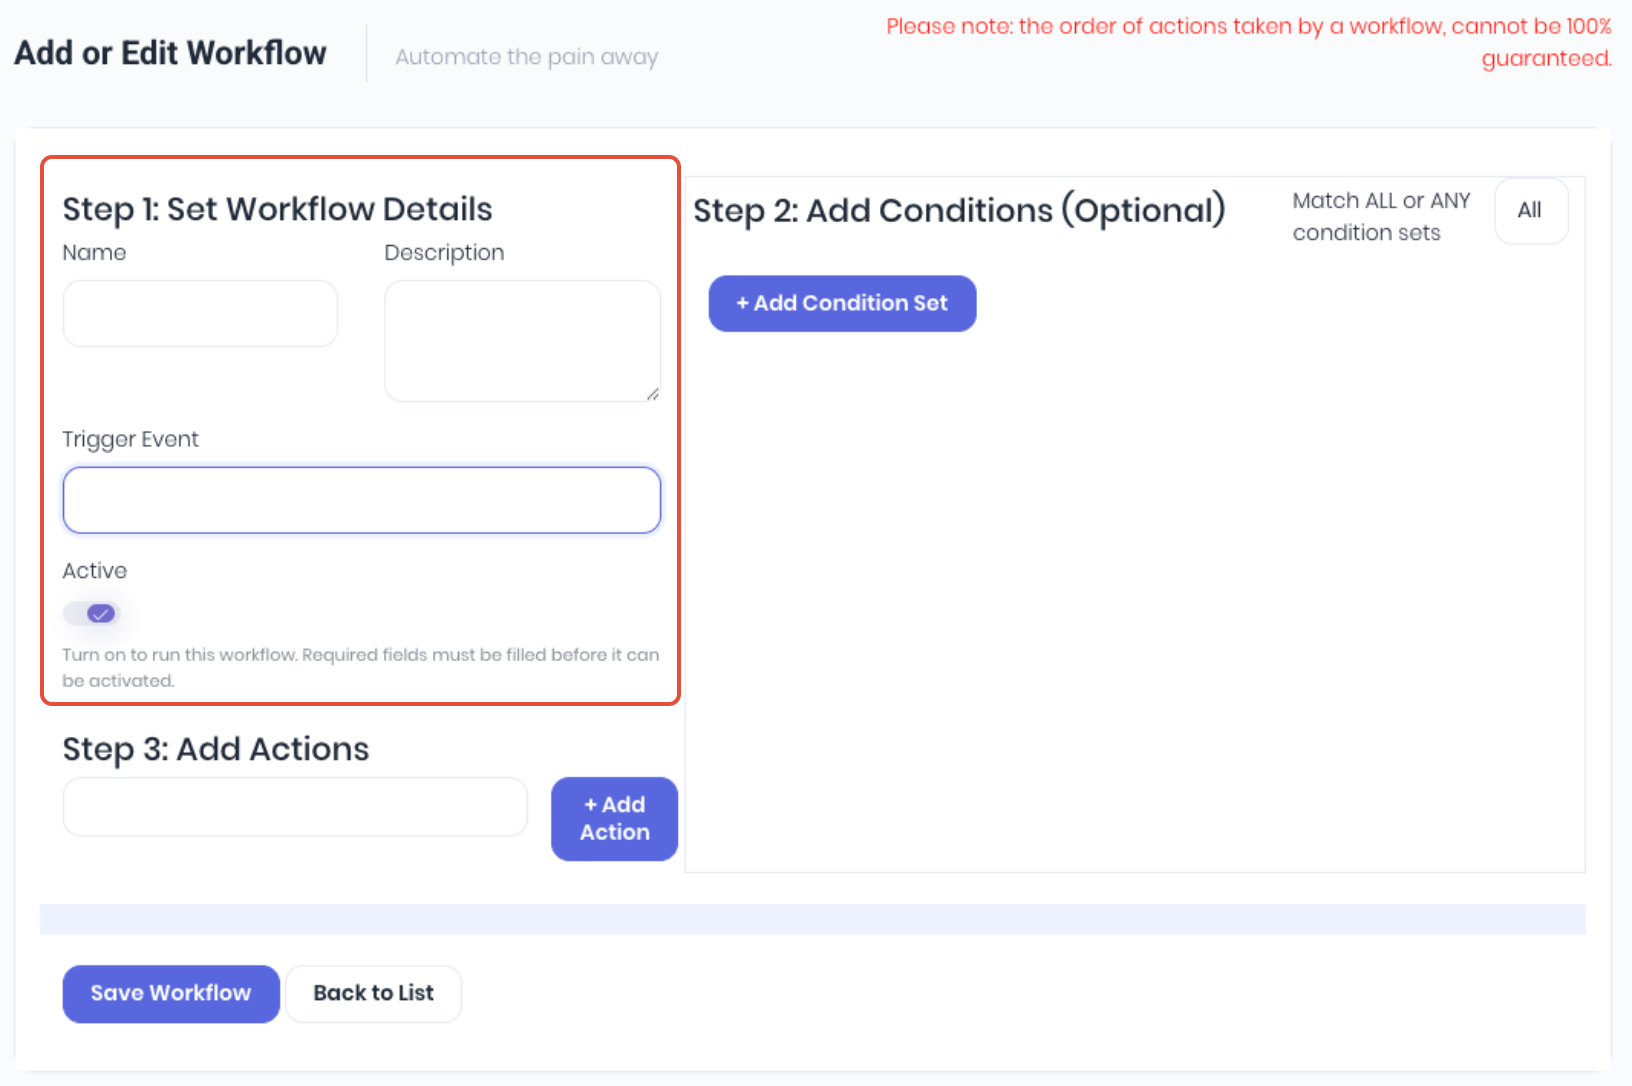
- Name - Workflow name
- Description - Workflow description
- Trigger Event - Select the type of event that you want to be triggered to start the workflow. There are two types of triggers:
- Event triggers - fire once, the moment something happens. Examples include a lead is created, a quote is issued, a project status changes. There's nothing to schedule with this setting; the workflow runs immediately as soon as the trigger is met.
- Timer triggers - run on a daily schedule and look across your open records (open quotes, open tasks, unpaid invoices, etc). They're how you build reminders and chase-ups ("remind the client 7, 14 and 21 days after a quote is sent"). Timer triggers use a day-based condition so each reminder fires once on its day, not every day afterwards. Note For Timer Based Triggers:
- Quote Timer - Will exclude "Expired", "Accepted", "Decline" Quotes.
- Invoice Timer - Will exclude "Paid" Invoices.
- Project Timer - Will exclude "Completed", "Cancelled" Projects.
- Lead Timer - Will exclude "Won", "Lost" Leads.
- Active - Toggle the active/inactive status of the new workflow.
Conditions
Next is to enter the Conditions if required by clicking Add Condition Set.
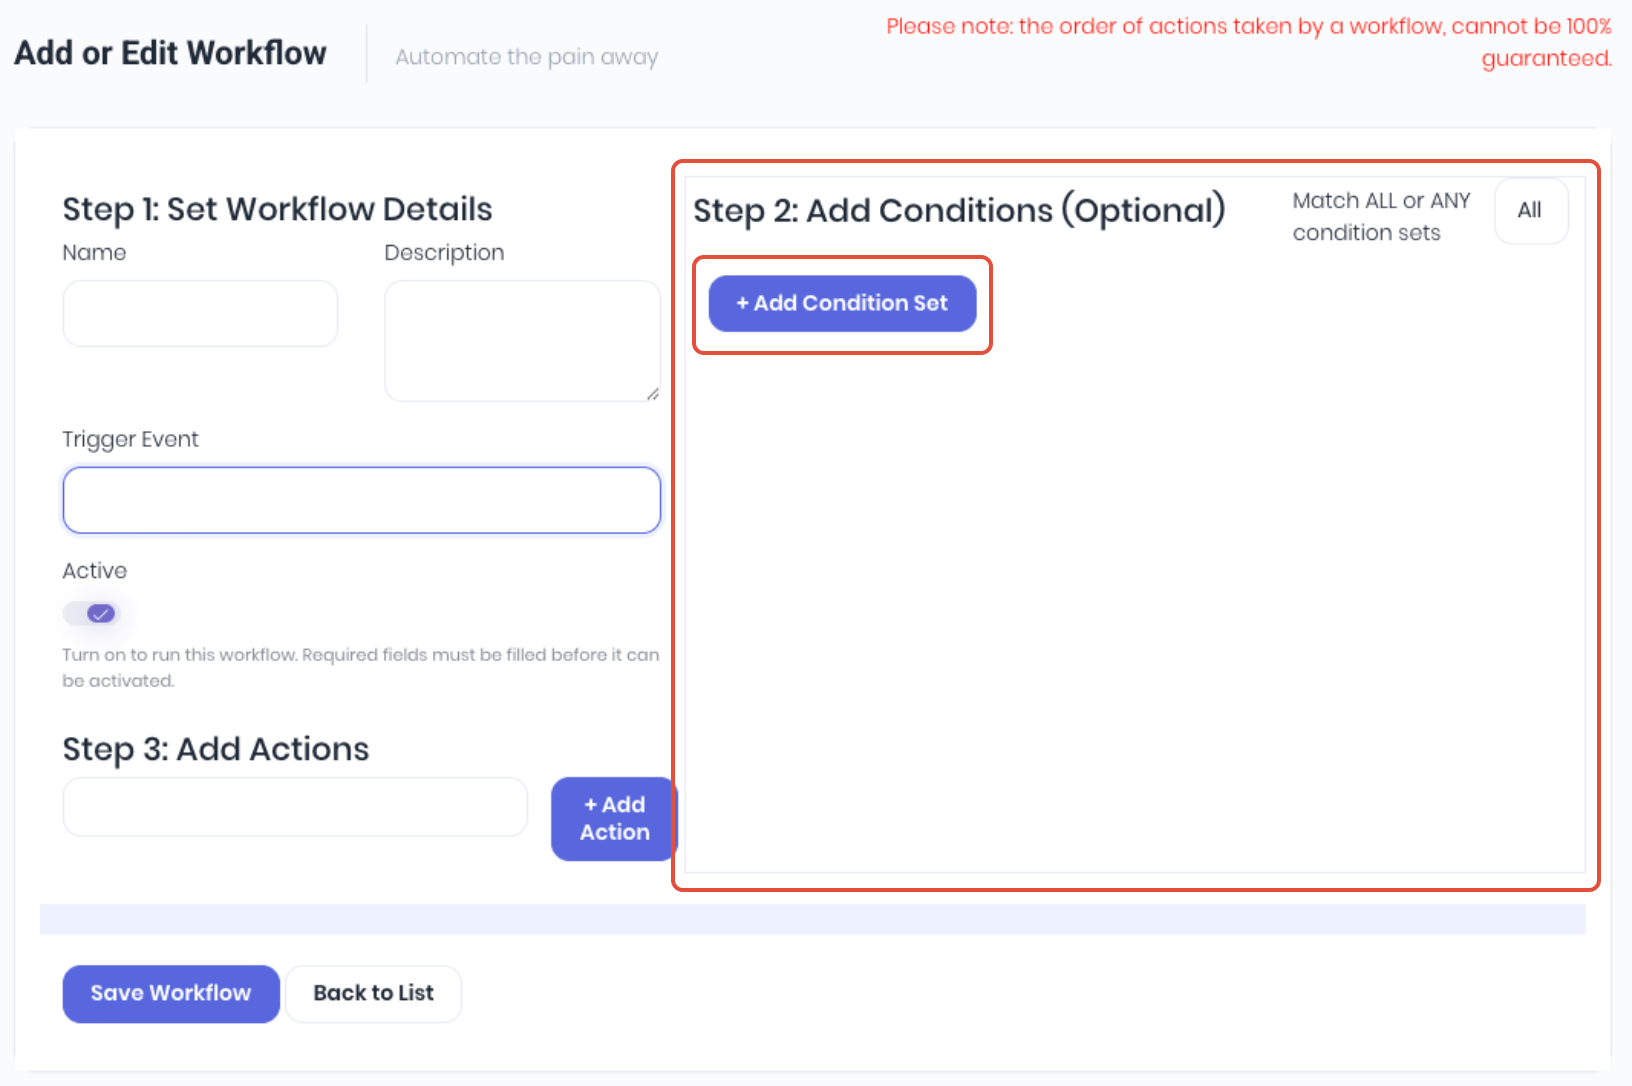
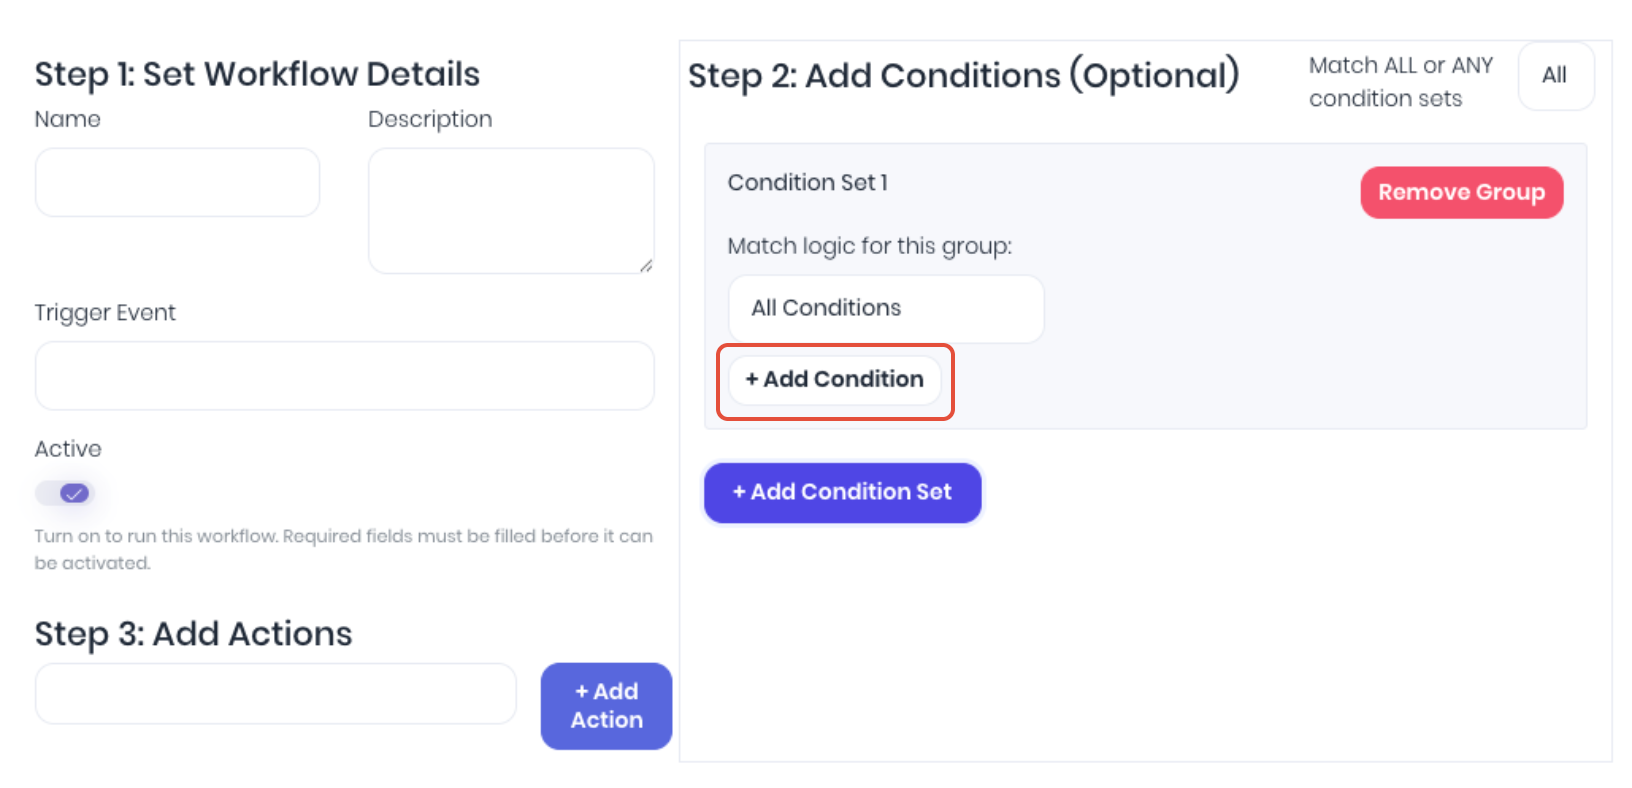
Conditions control how the Trigger Event is triggered using a logic operator and are optional. Add a condition to a condition set, click Add Condition. Note: If you can't add a condition, ensure a trigger event is correctly selected. You can add multiple condition sets if required. Use the Match ALL or ANY Condition Sets flag to control the condition logic if there are multiple condition sets.
Select the required conditions and logic in the condition.
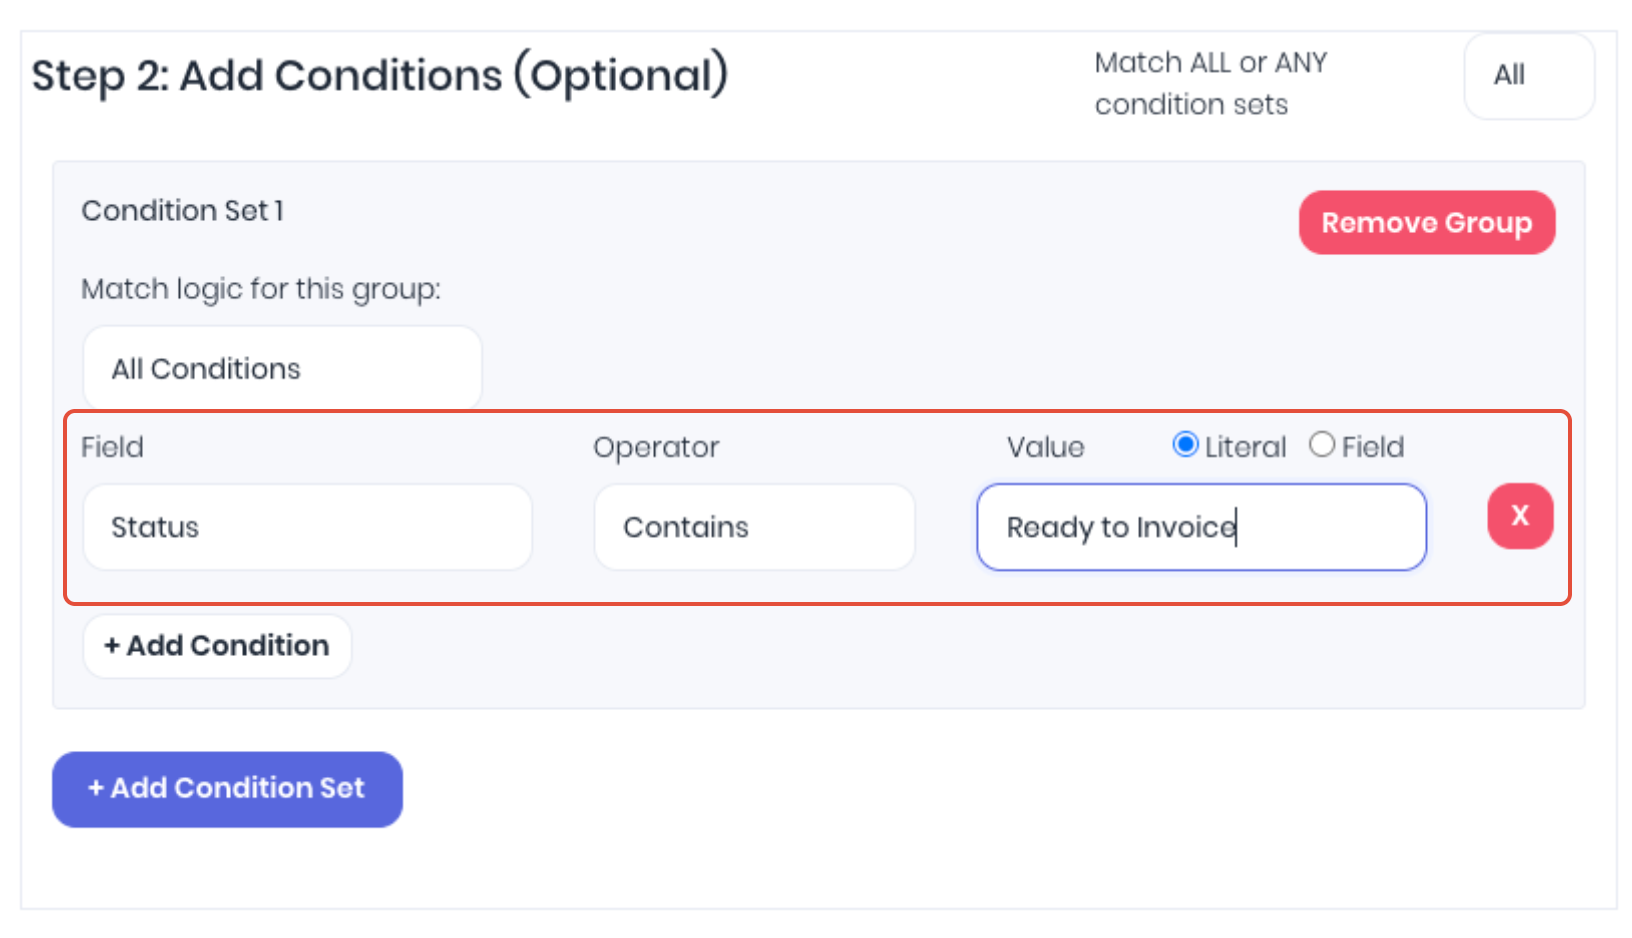
- Field - Select the required condition from the dropdown.
- Operator- Select the required logical operator that matches the query you want to build.
- Equals / Does Not Equal - Exact match (text is case-insensitive)
- Contains / Does Not Contain - Text contains the value
- Greater Than / Greater or Equal - Numbers and dates
- Less Than / Less or Equal - Numbers and dates
- Date is exactly *N* days old - For timer triggers only to let you build day-based reminders and chase-up
- Date is more than *N* days old - For timer triggers only to let you build day-based reminders and chase-up
- Date is less than *N* days old - For timer triggers only to let you build day-based reminders and chase-up
- Value- Enter or select the value required to enable the query logic.
- Literal - Enter the condition value as text.
- Field - Select a condition field to be used as the value.
- X - Remove condition.
Click Add Condition and repeat the entry to add multiple conditions for the condition set. You can use the Match Logic for this Group flag to control the required condition logic if there are multiple condition lines.
Actions
The final step is to add the Actions, which is what you want to do when the event is triggered.
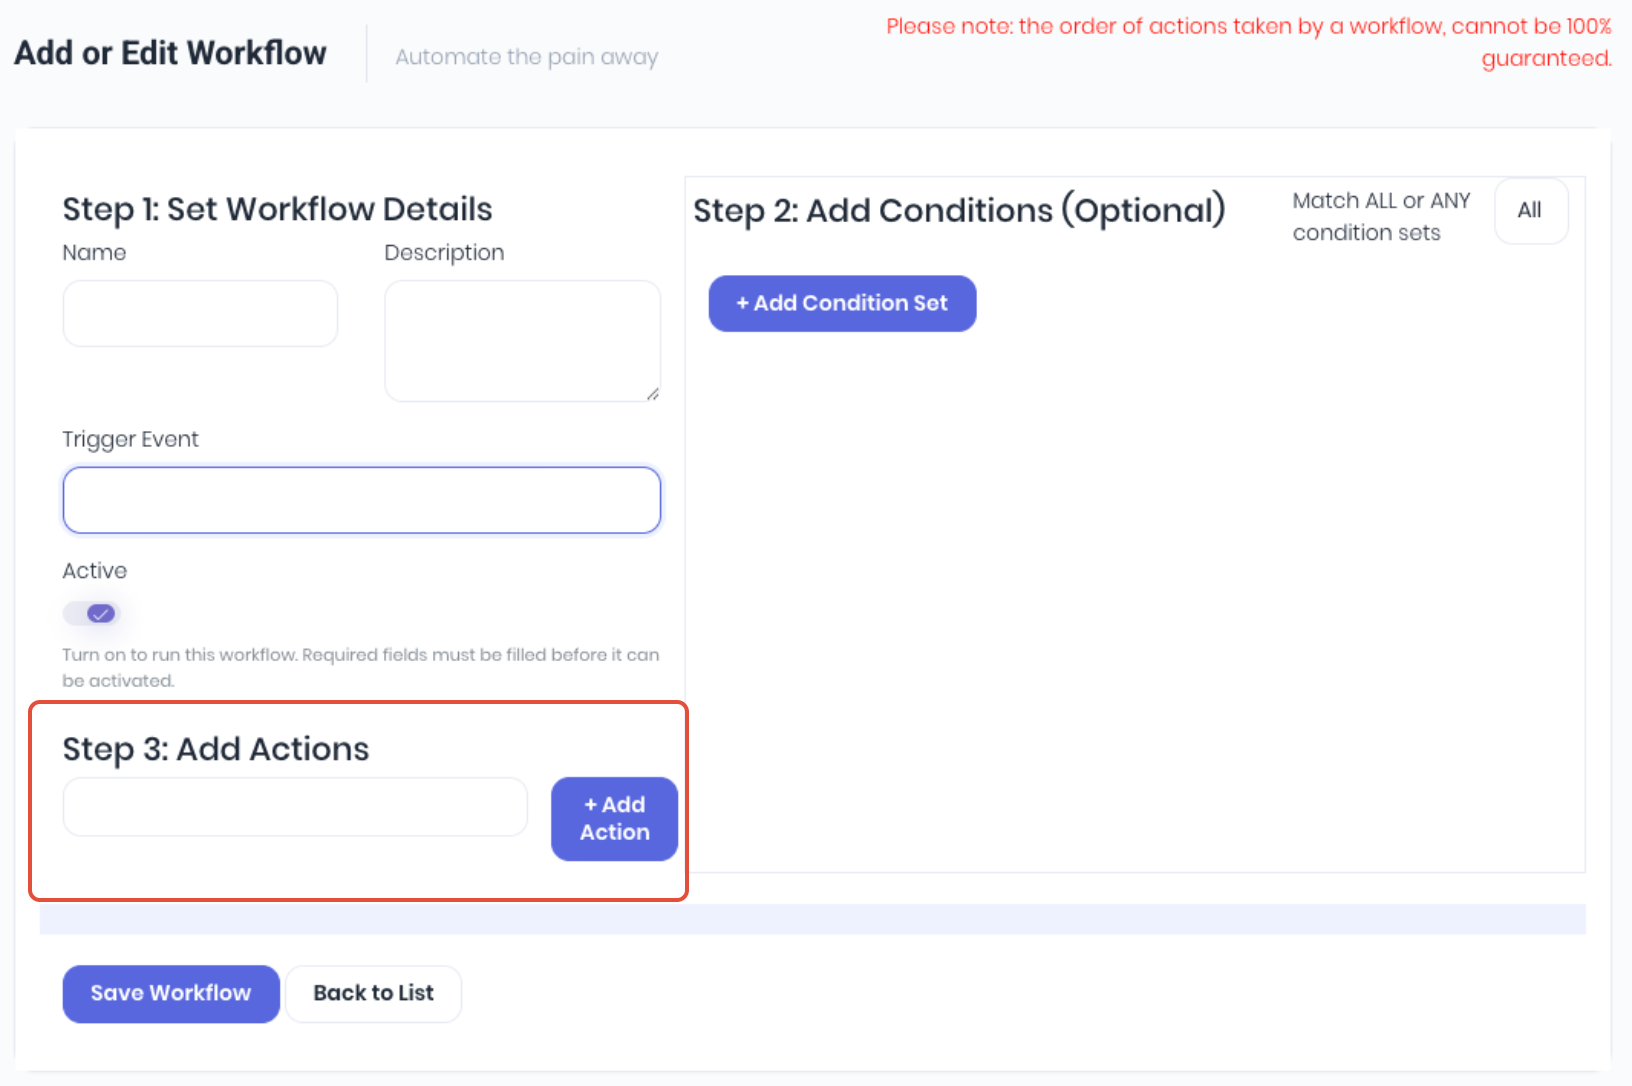
Select the action from the Actions dropdown and click Add Action. Note: The available Actions dropdown options are dependant on the selected Trigger Event.
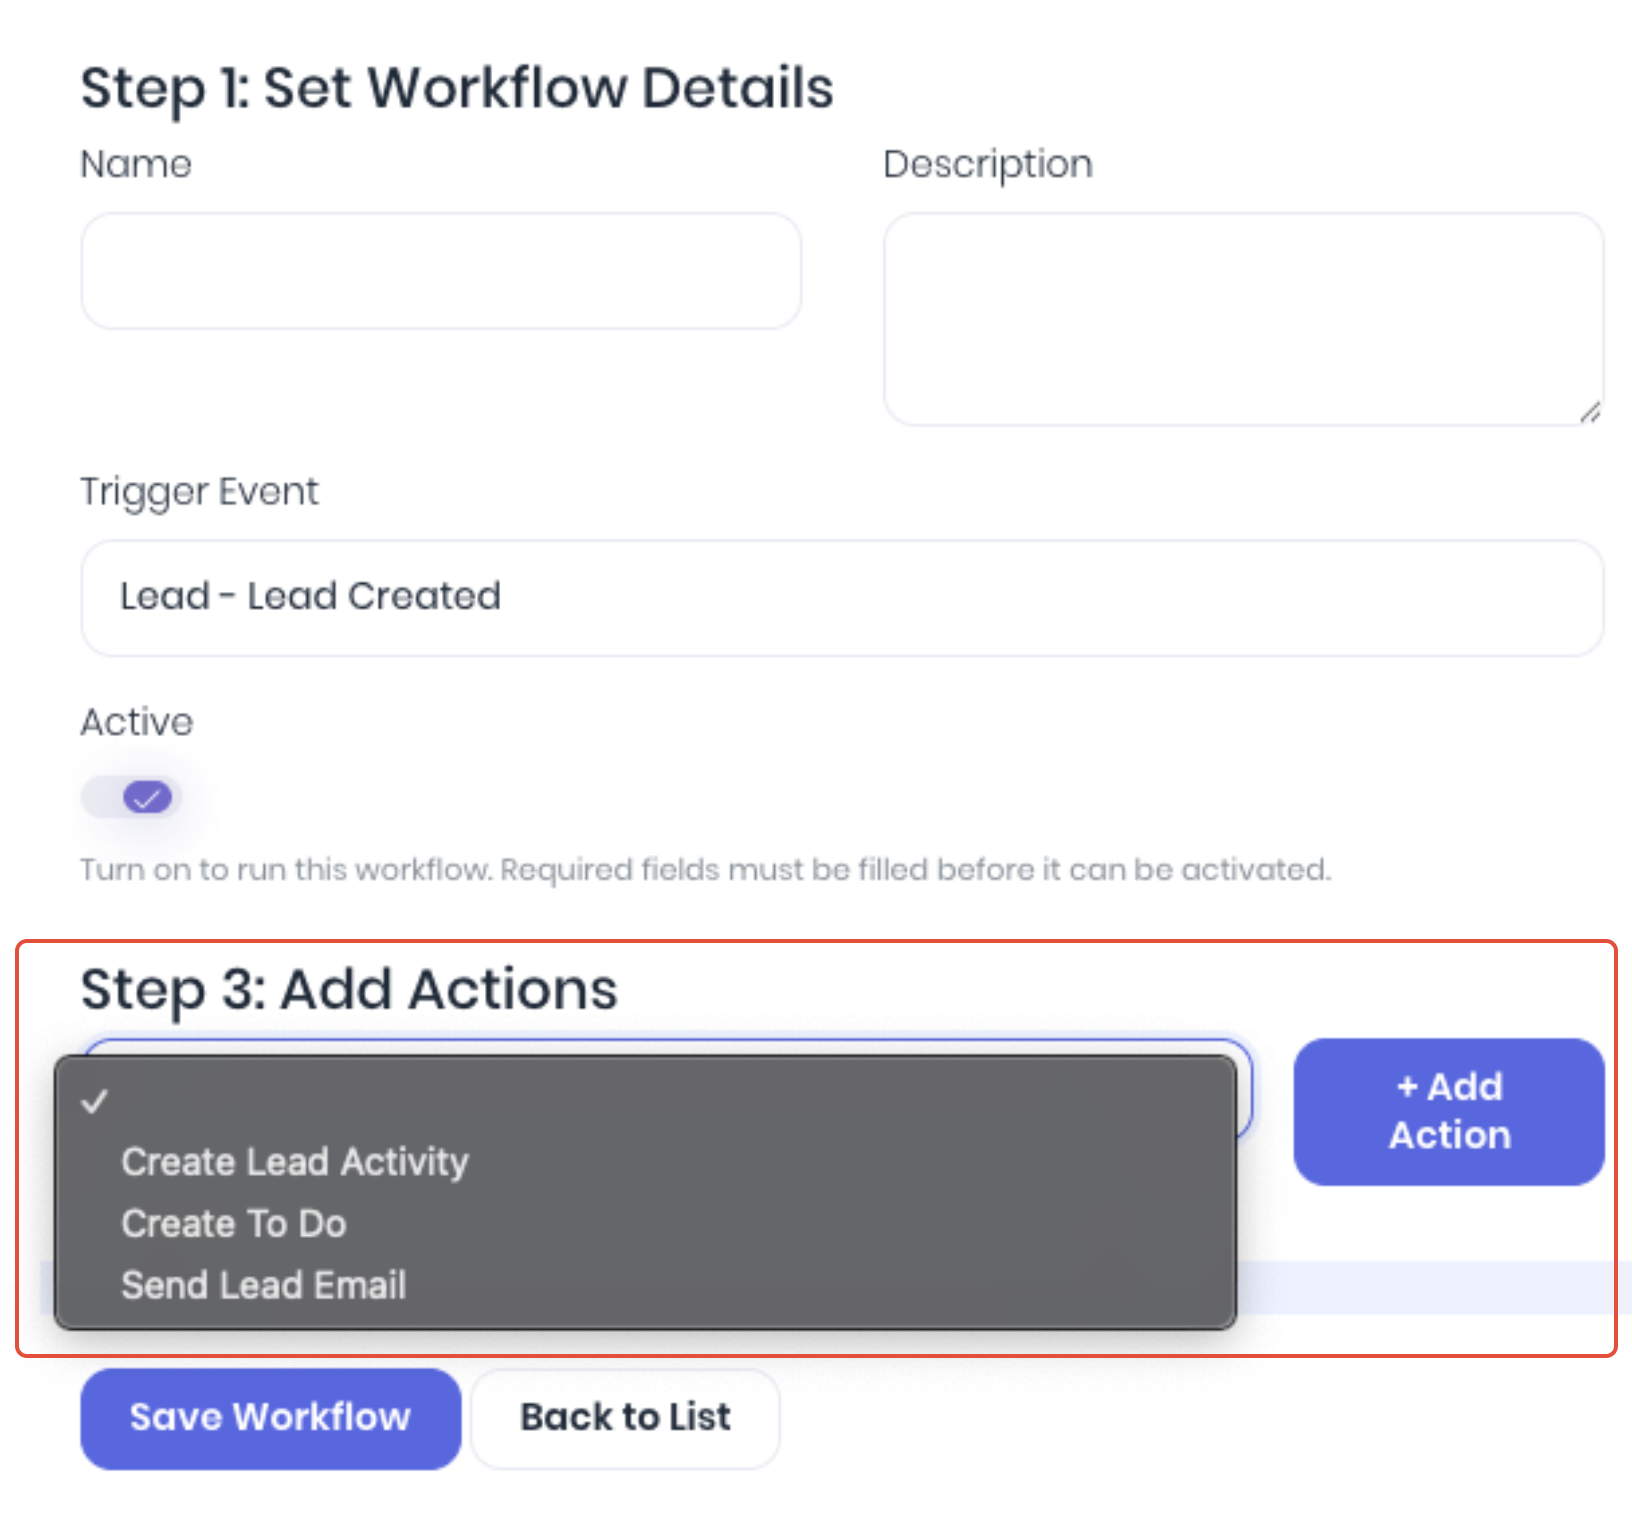
Depending on the Actions selected, you will be prompted to enter information required by that action. You can add multiple Actions as required.
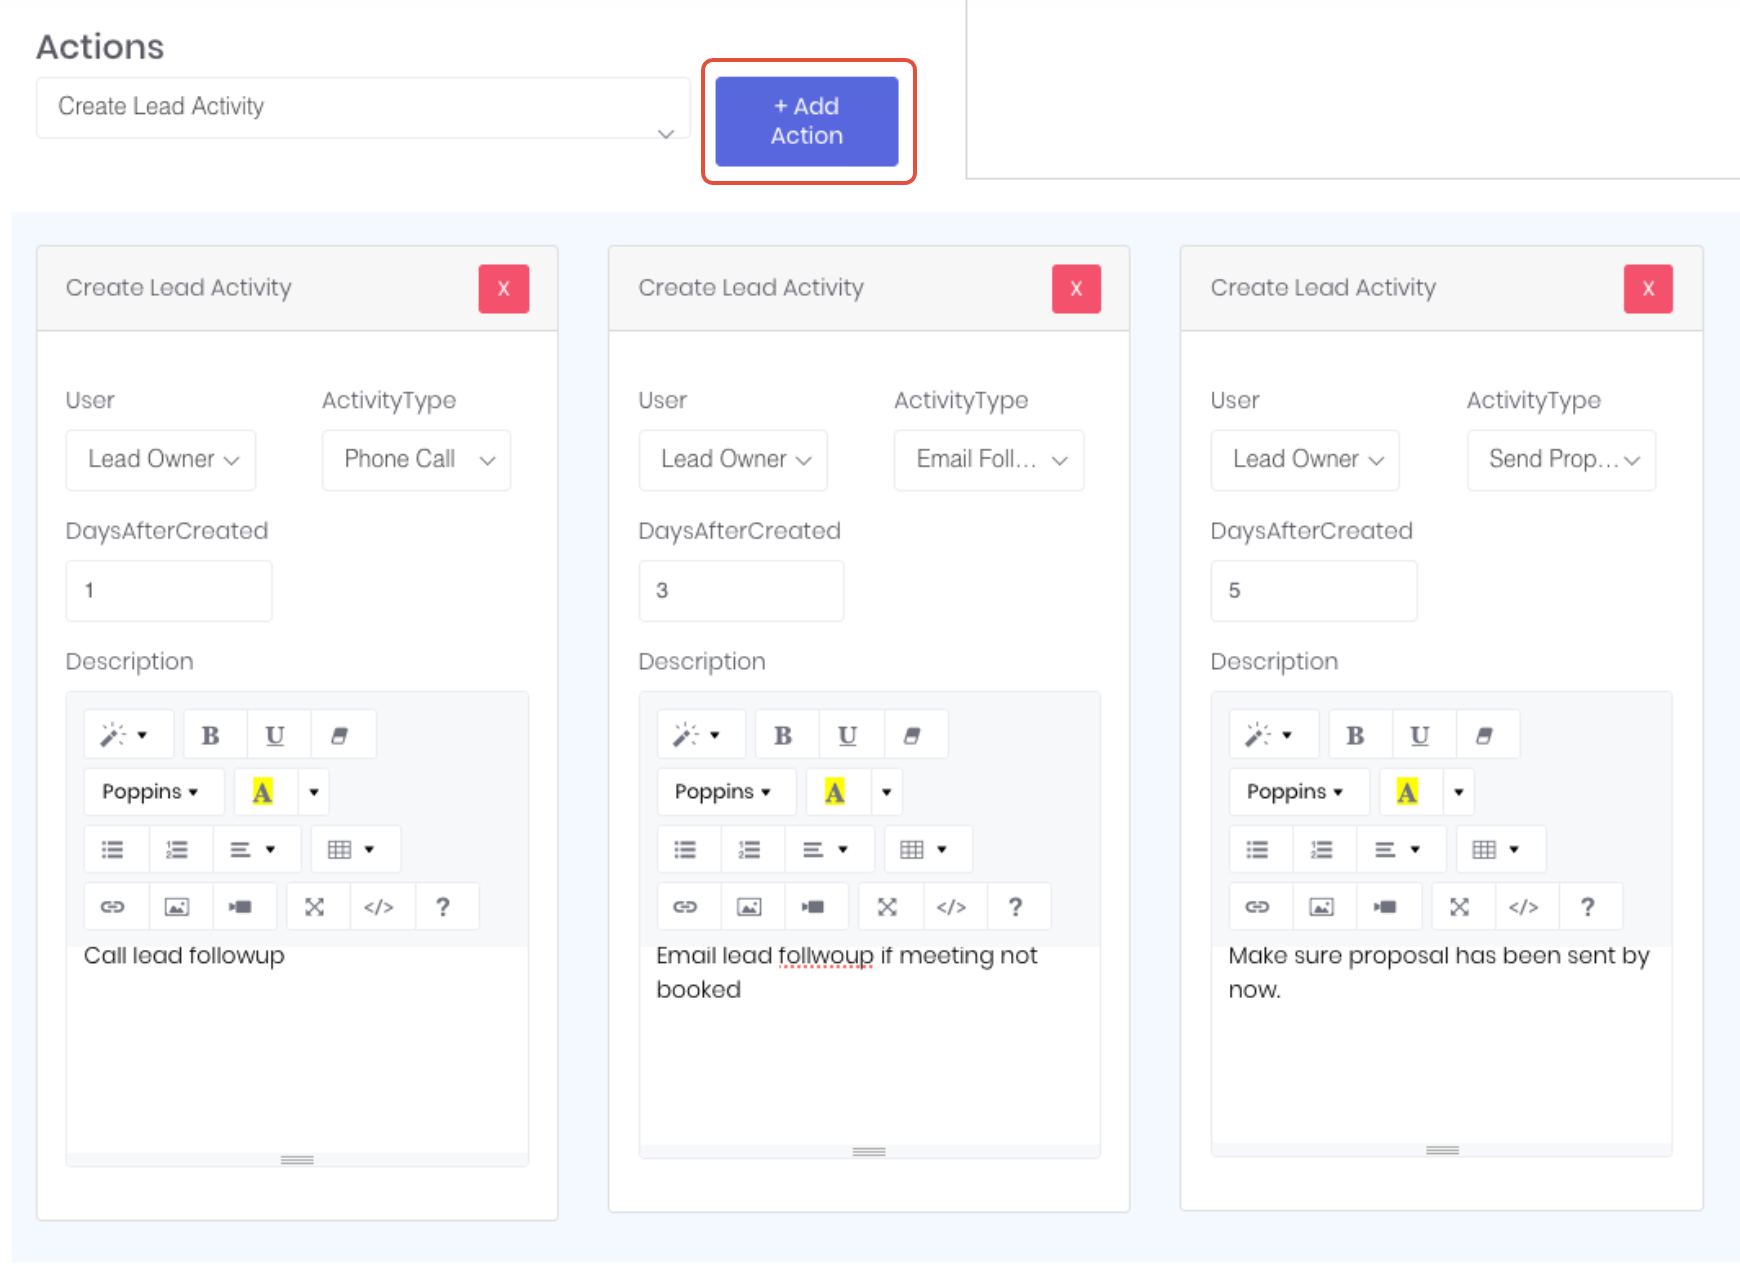
Confirm your Conditions and Actions and click Save Workflow to create the automation. The Workflow will fire the as soon as the next event is triggered that matches the conditions.
Was this article helpful?
That’s Great!
Thank you for your feedback
Sorry! We couldn't be helpful
Thank you for your feedback
Feedback sent
We appreciate your effort and will try to fix the article