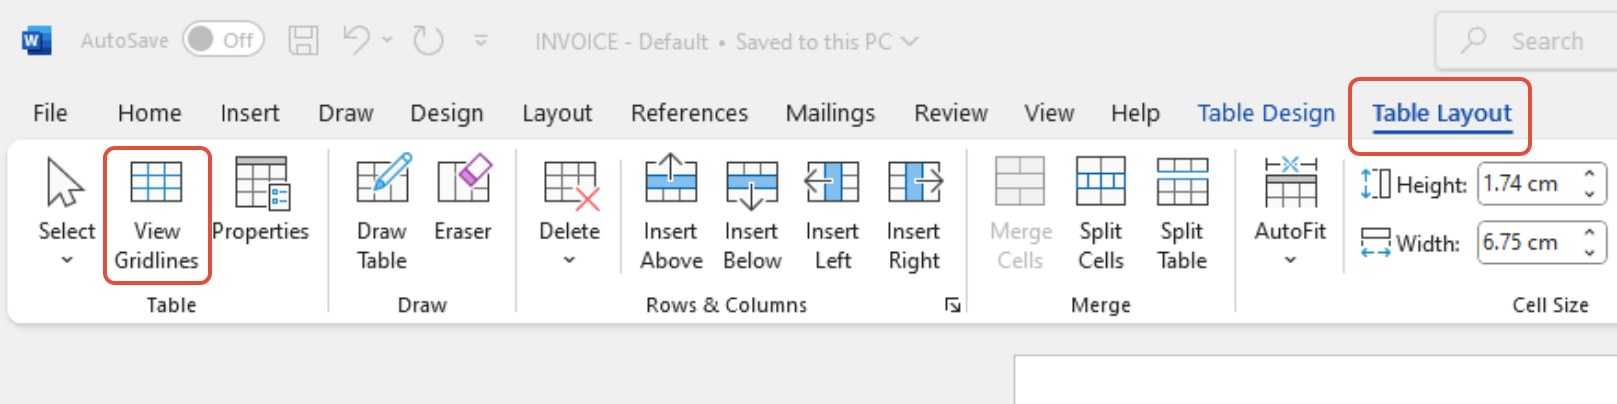
New document templates can be added to WorkGuru from the document template dashboard. The first step is to create the Word .docx template that lays out the document as you want it to look and print. If you haven't done so already, we recommend you enable the View Gridlines option in the Table Layout ribbon. This is essential to display the hidden tables that are recommended to explicitly control the layout of the template.
To create your template document, you can either:
- Download and edit an example template using WorkGuru merge fields that support the selected document type
- Convert your existing documentation using WorkGuru merge fields that support the selected document type.
- Create a document from scratch using WorkGuru merge fields that support the selected document type.
Available merge fields are dependant on the document type you are editing. Where and how you can use supported document template merge fields on the template is dependant on if they are:
- Universal Fields - Can be placed anywhere within a supported document template and do not need to be inside a repeating table.
- Table Fields - Table fields allow you to display repeating information from WorkGuru in your document templates. Unlike Universal Fields, which can generally be placed anywhere within a template, Table Fields must be placed inside a correctly configured table with an Alt Text Description field set within your template. When the document is generated, WorkGuru automatically repeats the relevant table row for each applicable record. Merge fields and Table Alt Text are case sensitive and must be entered exactly as displayed. See: Table Fields Reference
- Custom Fields - Custom fields can also be included in supported document templates that match the custom field type.
The formatting and layout of the document is entirely controlled by native Microsoft Word functionality, with the exception of table row headers. Ensure that your document templates meet the requirements to print correctly.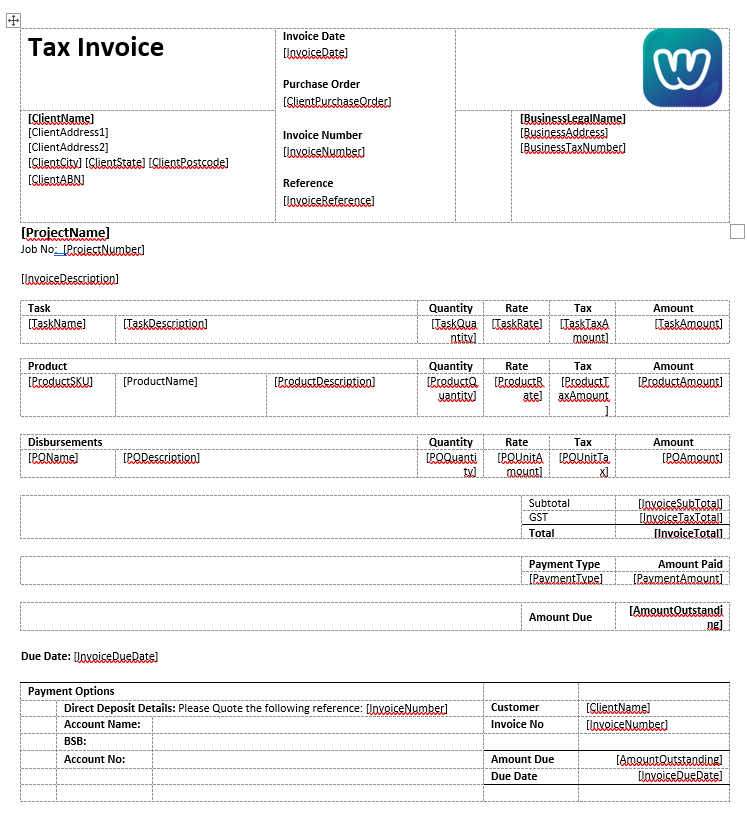
When you have completed creating your Word Template, click Add Document Template from the document template dashboard.
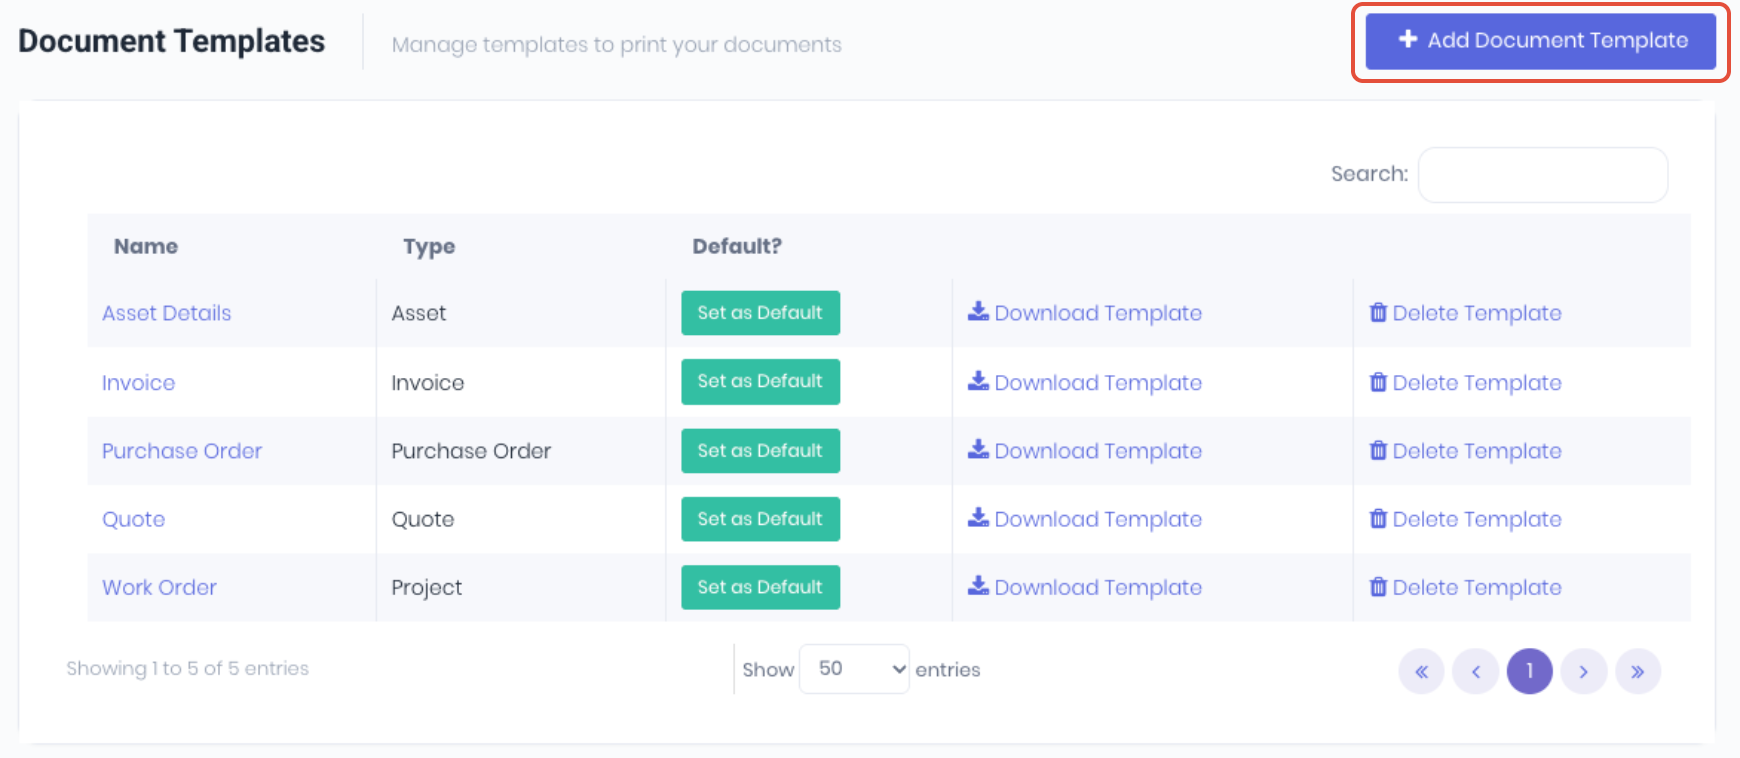 Add the document template by completing the following:
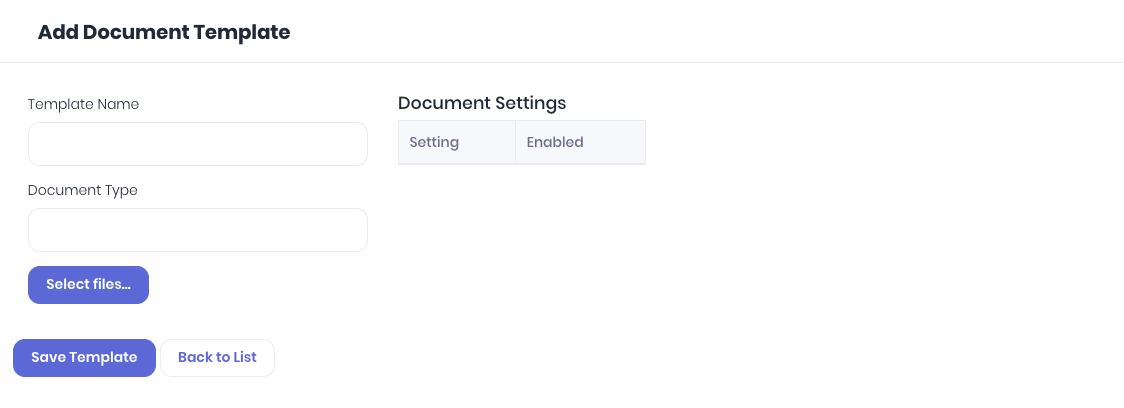
- Template Name - Give the template a descriptive name so it can be identified easily when printing/emailing documents
- Document Type - Select the correct document type which matches your .docx template. Note - It is important to select the correct document type that matches the merge fields in the .docx template. A quote .docx will not work if it is assigned as an Invoice etc.
- Document Settings - Depending on the selected Document Type, select if you want to Print BOM Components of kit products, or just display the kit product itself.
- Select files - Select the .docx template file from the finder to upload to WorkGuru when you save the template.
Select Save Template to upload file which will then be available to print or test from the relevant documents on display in the document template library.
Document template rules:
- Layout and formatting - Layout and formatting is all controlled by Word. If you need the output to be bold, italics, different font, size, colour, etc, just format the WorkGuru merge field (including the square brackets) the way you want the output text to look like.
- Margins - Custom margins may also impact the final layout when it comes to printing so we also recommend sticking with the default margins selectable within MS Word.
- Word Version - Ensure the Word document is NOT saved in the 2007-2013 Word document format. This is not compatible with WorkGuru's PDF converter and will cause an error. Save in the current Word format (.docx) with the compatibility checkbox NOT selected.
- Images
- the following image file types are compatible: tiff, tif, png, bmp, gif, jpg and jpeg.
- All images must be in line with text for the PDF converter to pick up. Especially when placed within tables.
- Images need to be in either the JPG or PNG format to be picked up by the PDF converter correctly.
- Not compatible - Image groups, Word drawings, word art, watermarks etc. Note: we recommend only 1 image on the template as more can introduce issues when printing
- Tables - Data that is displayed in table format, must have the correct alt-text entered in the table's properties to display correctly. Note: you can only have ONE of each table type (e.g. you cannot have 2 tables with the Alt Text of "Products") on the same template.
- MS Word Objects - Objects such as lines, formulae, shapes, etc are not supported
What to do if, on the printed PDF:
- The merge field is blank - This indicates the field does not have any data to print. Edit the source document and populate the relevant field for the document template to display.
- The merge field is displaying in full (with the square brackets)- This indicates either:
- There is a typo in the merge field text.
- The merge field is not compatible with that document template type. Eg: Invoice number cannot be displayed on a Quote template as it doesn't exist at the quote stage.
- Tables not displaying - Tables are designed to be hidden if there is no data provided to the document when printed. If the table is expected to display date and isn't, ensure that the correct table description is set in the table's properties correctly. Note - depending on the layout of the word document, a table that can't display correctly may also prevent non-table information from displaying on the template as well.
Was this article helpful?
That’s Great!
Thank you for your feedback
Sorry! We couldn't be helpful
Thank you for your feedback
Feedback sent
We appreciate your effort and will try to fix the article