You can raise a new purchase order in WorkGuru from either the purchase order dashboard's Actions button or the shortcut from the WorkGuru menu (Purchases -> New Purchase Order). Click New Purchase Order from the menu or Create New Purchase Order from the Actions menu.
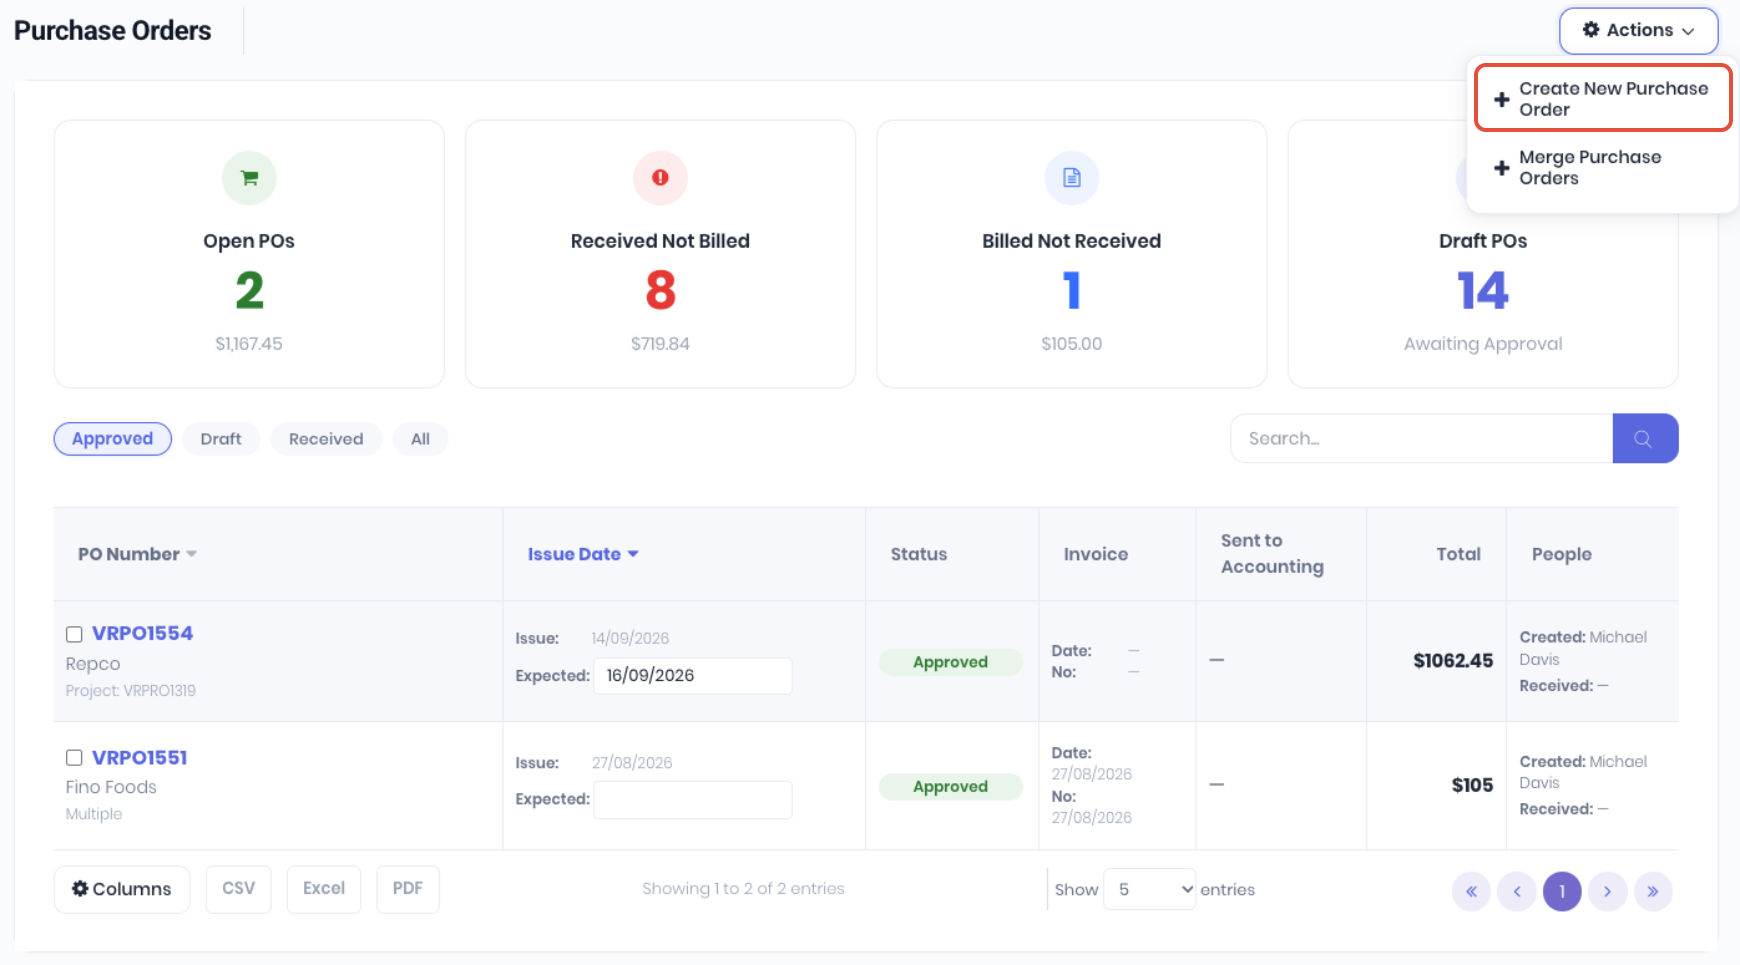
Purchase Order Details
Fill out the new purchase order details. WorkGuru will prompt if you missed any required fields.
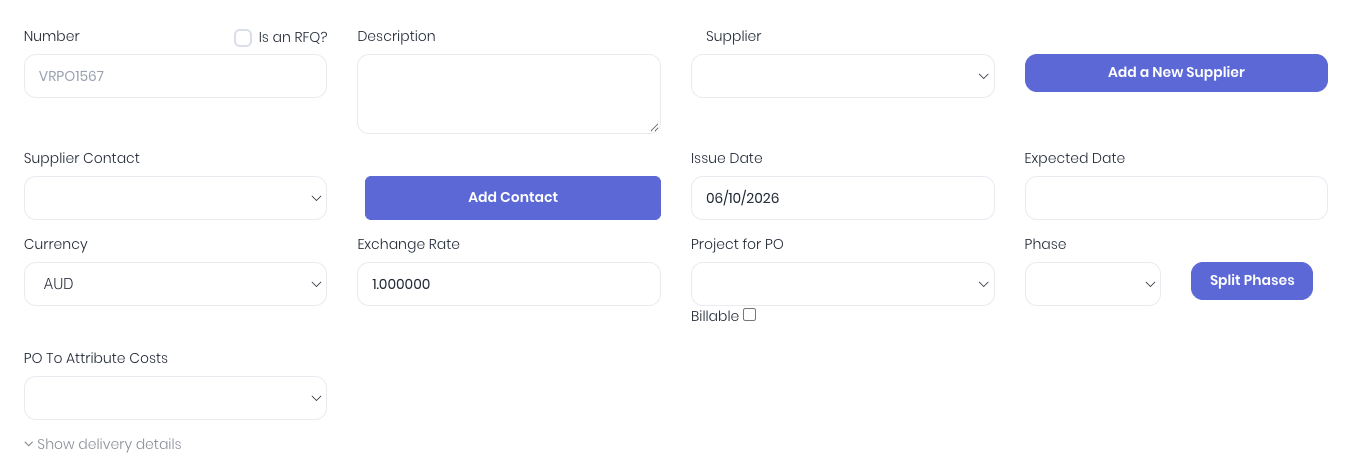
- Is an RFQ? - Enable the Request for Quote (RFQ) workflow.
- Number - Default is to leave blank so WorkGuru uses the next number in the document sequence. Enter a manual number to overide.
- Description - Purchase description.
- Supplier - Select the supplier from the dropdown or if not in the current supplier list, click Add a New Supplier to add the new Supplier. Once a supplier is selected, you can click the Build Order form to add all products assigned defaulting to that supplier to the order.
- Supplier Contact - Once a supplier is selected, you can select from the dropdown or click Add Contact to add a new contact.
- Issue Date - Date the purchase order is issued, defaults to the current day but you can forward or back date.
- Expected Date - Date the stock is expected to be received
- Currency - Select purchase currency. List needs to be configured first here.
- Exchange Rate - Defaults to the current exchange rate. Can be updated.
- Project for PO - The selection determines the type of purchase order.
- Stock Purchase Order - Leave blank for a stock purchase order. Note: Received stock controlled line items WILL increase stock on hand and will need to be used or dispatched on projects, production jobs or stock sales.
- Project Purchase Order - Select a project or production job to create a project purchase order. Note: Received line items are expensed on the project and WILL NOT increase your available stock on hand.
- Phase - If a project has been selected in the Project for PO field, select a phase if available on the project. This tracks the order's cost against the phase on the project.
- PO to Attribute Costs - Leave blank UNLESS the order is for landed costs for an existing stock purchase order.
- Reporting Category - If you have enabled Xero reporting categories on purchases, you can select them here. This field may be mandatory depending on your Xero settings.
- Custom Fields (Optional) - Any custom fields that you have created and assigned to purchase orders will display below the default purchase order fields.
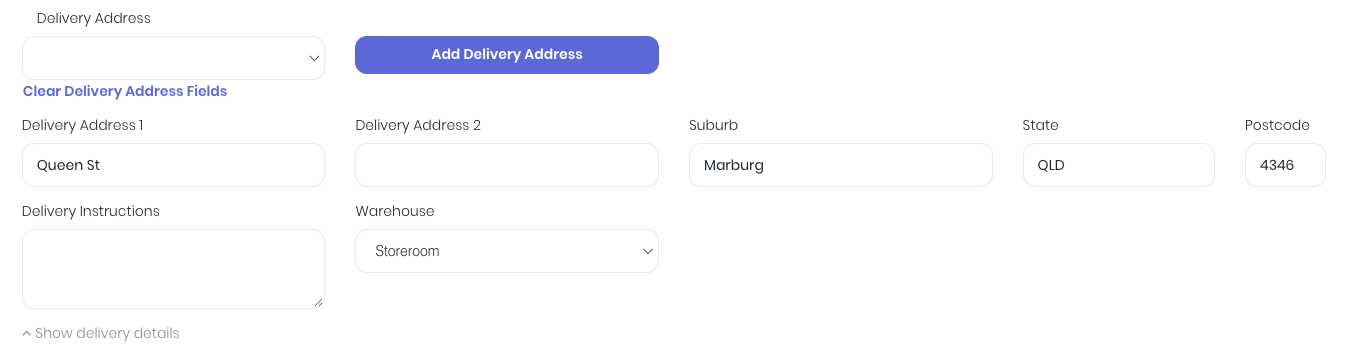
Click Show Delivery Details to update default delivery details. Note: Delivery fields are automatically filled in with the default warehouse details.
- Delivery Address - Select an alternate delivery address, or click Add Delivery Address to add a new address. Leave blank to default to the selected warehouse address. This is useful for repeatable drop ship locations. Otherwise you would just manually edit the following delivery address fields for a one-off location.
- Delivery Address 1 - Address the order is to be delivered to (This defaults to the selected warehouse address).
- Delivery Address 2 - Address the order is to be delivered to (This defaults to the selected warehouse address).
- Suburb - Suburb the address the order is to be delivered to (This defaults to the selected warehouse address).
- State - State of the address the order is to be delivered to (This defaults to the selected warehouse address).
- Postcode - Postcode of the address the stock is to be delivered to (This defaults to the selected warehouse address).
- Delivery Instructions - Any specific instructions for the supplier. This prints on the purchase order template
- Warehouse - Which warehouse is the stock going to be delivered to and add to the stock on hand.
- Advanced Purchase - Select to purchase items for multiple projects.
- Add Template - Add a purchase order template.
Purchase Order Line Items
Next step is to add product lines that you are purchasing. You can automatically populate the order's line items by using purchase templates (Add Template) or selecting existing project's line items using the Advance Purchase function.

Add products individually by searching in either the SKU or Name fields for existing products. You also have the ability to add ad-hoc line items (not in the Product database), by not selecting a database an manually entering the required fields Ad-hoc products can be saved to the product database without double entry when the order is received. You can add multiple products as required using the Add Product button.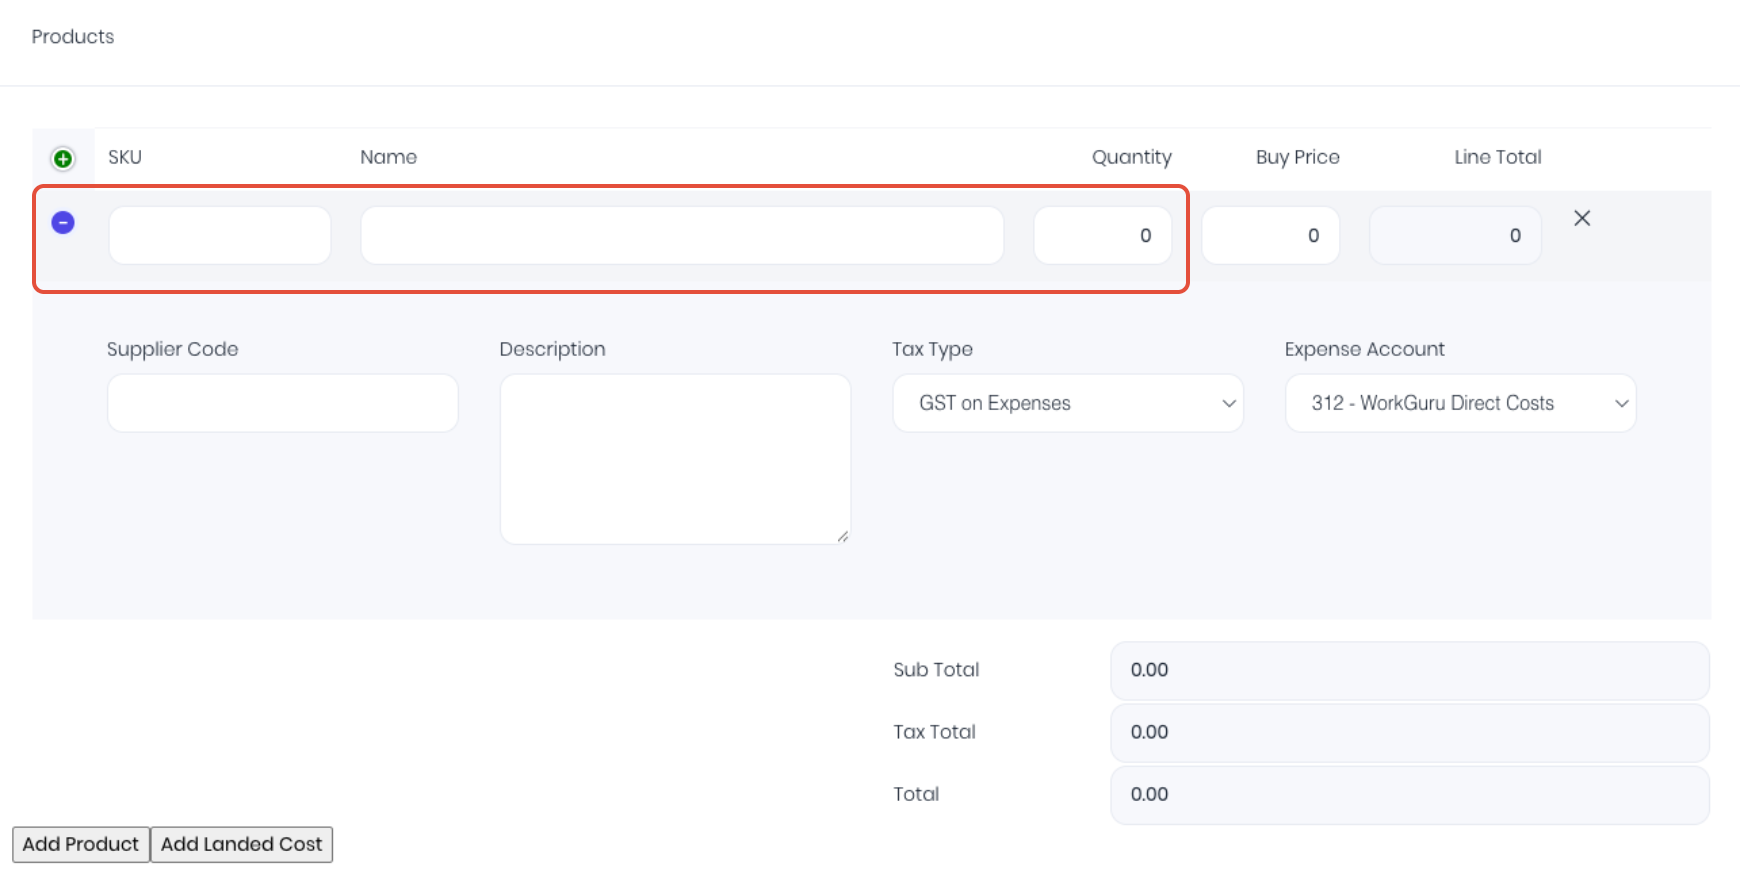
- SKU - Stock Keeping Unit, or product code.
- Name - Product name
- Quantity - Number of products ordered
- Buy Price - Forecast supplier purchase price.
Click the blue + (expand) icon at the start of the row to display additional fields.
- Supplier Code - The suppliers product SKU. Displays on the PO when printed.
- Description - Product description/details. Defaults to the product description but can be changed to be order specific.
- Tax Type - Tax status of line item (Defaults to the product's tax rate or default expense tax rate).
- Expense Account - Integrated accounting system expense account (Defaults to the product's GL or the default expense account)
Confirm the order by checking the product line item's SKU, quantity and buy price, line total and order totals. If ok, click Save (to save the PO as a draft), or Save and Approve, to issue the PO.
Was this article helpful?
That’s Great!
Thank you for your feedback
Sorry! We couldn't be helpful
Thank you for your feedback
Feedback sent
We appreciate your effort and will try to fix the article